Homemade vanilla marshmallows are a true revelation, far surpassing anything you can buy in a bag. The secret to their incredible texture and flavor lies in using real vanilla bean and mastering the sugar syrup temperature. This recipe guides you through creating delicate, cloud-like treats that are perfect for elevating your hot chocolate or s’mores. I still remember the first batch I made where the syrup wasn’t hot enough – the marshmallows didn’t set right. It taught me the critical importance of a candy thermometer. This recipe is designed to help you avoid common pitfalls and achieve perfect vanilla marshmallows every time.
Key takeaways
- Achieve perfect marshmallow fluff by accurately cooking the sugar syrup to 240°F (115°C) for proper gelatin setting.
- Ensure egg whites are whipped to soft peaks before slowly adding the hot syrup to create a stable foam.
- Avoid over-whipping the mixture after adding the syrup to maintain a tender, cloud-like texture.
- Evenly distribute vanilla bean seeds during whipping for consistent flavor and visual appeal.
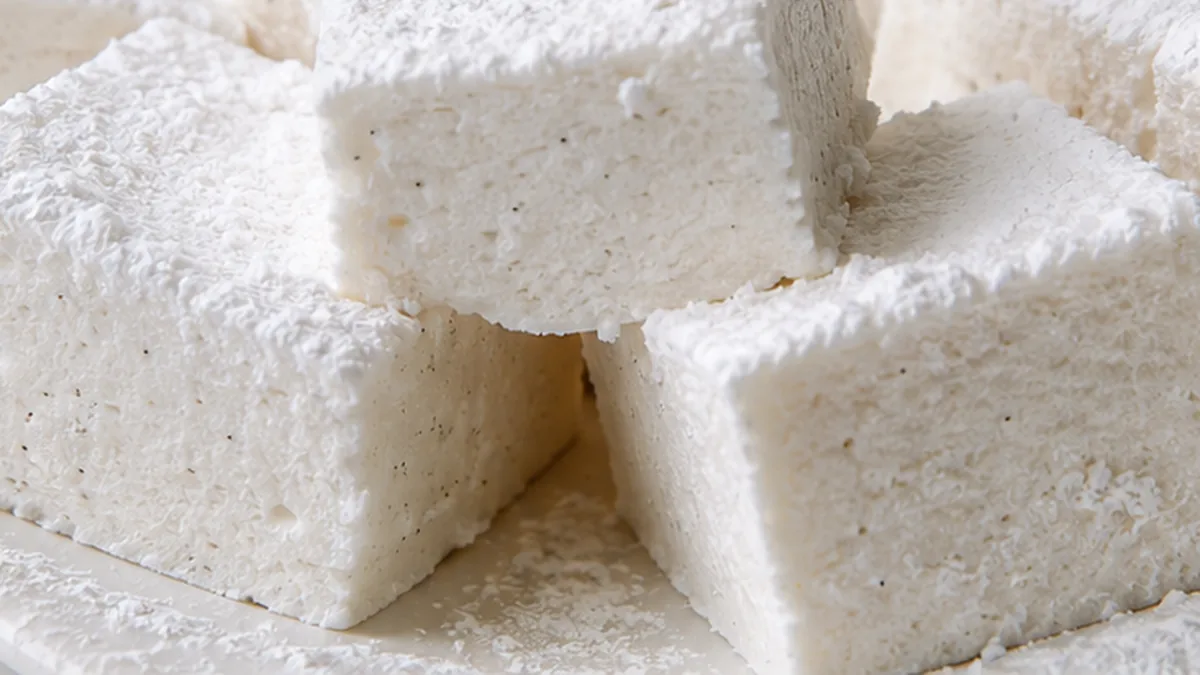
Cloud-Like Vanilla Bean Marshmallows
Ingredients
Method
- Spray a 9×13-inch glass or ceramic baking pan with cooking spray. Mix powdered sugar and cornstarch, then dust the pan generously, reserving some.
- In a stand mixer bowl, add gelatin and “⅔ cup cold water”. Mix for 30 seconds, then let bloom for 20 minutes.
- In a saucepan, whisk sugar, salt, and remaining 1 cup water. Bring to a boil and cook until 240°F (about 15 minutes).
- With the mixer on low, slowly pour the hot sugar mixture into the gelatin. Increase speed to medium-high and beat for 10 minutes until thick and fluffy.
- Beat in egg whites for 5 minutes, then mix in vanilla extract and vanilla bean seeds.
- Pour marshmallow into the prepared pan and smooth. Let sit uncovered at room temperature for at least 8 hours.
- Once firm, prepare a parchment-lined surface dusted with the reserved cornstarch/sugar mixture.
- Use a sharp knife to loosen edges, then turn the marshmallow out onto the prepared surface.
Notes
– For clean cuts, lightly grease your knife with cooking spray before slicing the marshmallows. This prevents sticking and gives you neat edges.
– Store homemade marshmallows in an airtight container at room temperature for up to 2 weeks, layered with extra powdered sugar/cornstarch to prevent sticking. They can also be frozen for up to 2 months. Nutrition information is an estimate, calculated automatically. Values vary with brands, substitutions and portion sizes.
The Science Behind the Fluff: Gelatin and Aeration
The magic of these cloud-like marshmallows lies in the precise interaction of gelatin and whipped egg whites. Gelatin, a protein derived from collagen, acts as a gelling agent. When bloomed in cold water, its protein chains hydrate and uncoil. When heated and then cooled, these chains reconfigure, forming a three-dimensional network that traps air and liquid. This network provides the structure that gives marshmallows their characteristic chewy yet airy texture. The granulated sugar and water are cooked to a specific temperature (240°F or 115°C), creating a sugar syrup. This hot syrup is crucial; it not only dissolves the sugar but also sterilizes the mixture and denatures the gelatin further, ensuring a smooth, stable marshmallow. The key to achieving the “cloud-like” texture is the rapid incorporation of this hot syrup into the vigorously whipped egg whites. The egg whites, stabilized by the gelatin and sugar syrup, create a stable foam. The vanilla bean seeds add concentrated flavor throughout the marshmallow, not just on the surface.
Troubleshooting Common Marshmallow Mishaps
- Marshmallows are too sticky or won’t set: This usually indicates the sugar syrup was not cooked to a high enough temperature. The syrup needs to reach 240°F (115°C) to ensure proper gelling with the gelatin. Reheating is not advisable as it can degrade the gelatin. Ensure accurate thermometer use next time.
- Marshmallows are grainy or crystallized: This can happen if the sugar syrup is agitated too much during cooking or if undissolved sugar crystals are present on the sides of the pot. Avoid stirring the syrup once it reaches a boil, and wash down the sides of the pan with a wet pastry brush if crystals form.
- Marshmallows are tough or rubbery: Over-whipping the egg whites before adding the syrup, or over-whipping the entire mixture after adding the syrup, can lead to a tougher texture. Whip the egg whites to soft peaks before slowly streaming in the hot syrup, then whip until just thickened and glossy, not stiff.
- Uneven flavor or texture: Ensure the vanilla bean seeds are evenly distributed throughout the mixture when it’s being whipped. If using vanilla extract, add it at the end of whipping to preserve its volatile aromatics.
Ingredient Swaps and Their Impact
- Replacing vanilla bean with vanilla extract: You can substitute 2 teaspoons of good quality vanilla extract for the vanilla bean. Add it during the final stages of whipping. The flavor will be less complex and lack the visual specks of vanilla bean.
- Using a different liquid for blooming gelatin: While water is standard, a clear fruit juice (like apple or white grape) could be used for blooming. This will impart a subtle fruity note and may slightly alter the final texture due to the juice’s sugar content.
- Alternative to cornstarch/powdered sugar dusting: A mixture of granulated sugar and cornstarch can be used, but it will result in a stickier coating. A light dusting of unsweetened cocoa powder or finely shredded coconut can also be used for flavor and appearance, but will change the overall taste profile.
- Different types of gelatin: While Knox is standard, other unflavored gelatin brands can be used. Ensure you use the equivalent amount based on the manufacturer’s instructions for bloom strength, as gelatin strengths can vary.
Pro tips
- Use a candy thermometer! Reaching exactly 240°F (115°C) is crucial for the sugar syrup to ensure proper marshmallow setting. Too low, they’ll be runny; too high, they’ll be hard. – Don’t overmix the egg whites. You want soft peaks, not stiff, dry meringue, to keep the marshmallows airy and not rubbery.
- For clean cuts, lightly grease your knife with cooking spray before slicing the marshmallows. This prevents sticking and gives you neat edges.
- Store homemade marshmallows in an airtight container at room temperature for up to 2 weeks, layered with extra powdered sugar/cornstarch to prevent sticking. They can also be frozen for up to 2 months.
Creating your own vanilla marshmallows is a rewarding experience, transforming simple ingredients into a gourmet delight. Give this recipe a try and elevate your sweet treats!
Frequently asked questions
Why do my marshmallows not set?
Your sugar syrup likely didn’t reach the critical temperature of 240°F (115°C). This temperature is essential for activating the gelatin’s gelling properties. Ensure your candy thermometer is accurate and cook the syrup until it registers this specific temperature before pouring it into the whipped egg whites.
Can I use vanilla extract instead of a vanilla bean?
Yes, you can substitute 2 teaspoons of vanilla extract for the vanilla bean. For the best flavor, add the extract during the last minute of whipping the marshmallow mixture. The flavor will be less nuanced than using a real bean, and you’ll miss the visual specks.
My marshmallows are too sticky. What went wrong?
Stickiness often results from the sugar syrup not being cooked hot enough, or the mixture not being whipped long enough to incorporate enough air and structure. Ensure you reach 240°F and whip until the mixture is thick, glossy, and has significantly increased in volume.
How should I store homemade marshmallows?
Store your finished marshmallows in an airtight container at room temperature, separated by layers of parchment paper or dusted generously with the powdered sugar/cornstarch mixture to prevent sticking. They are best enjoyed within 1-2 weeks.
Try this next: Heavenly Penuche Fudge: Creamy Vanilla Dream!
More from Gluten-Free Desserts & Sweets →