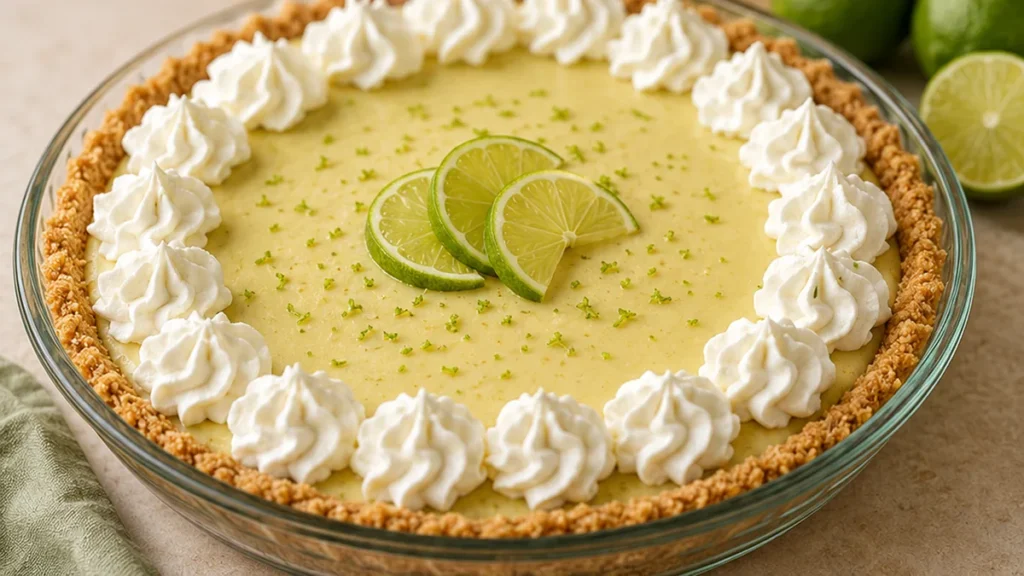
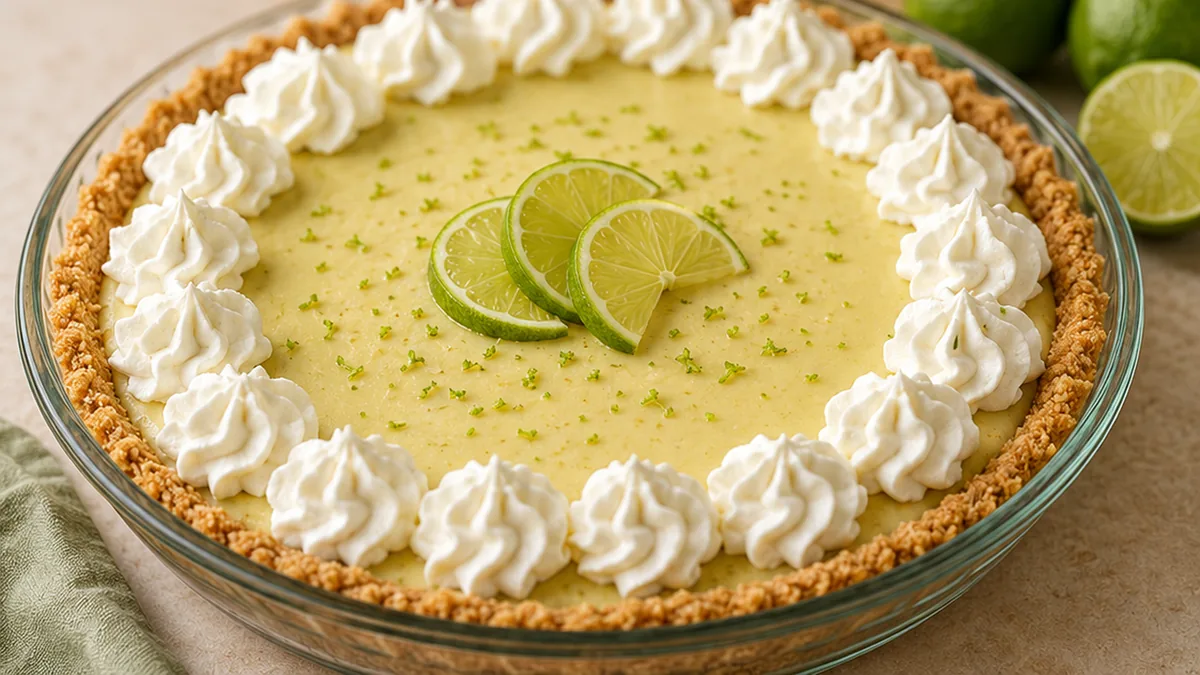
This Gluten-Free Key Lime Pie is the ultimate treat for anyone seeking a perfectly balanced dessert. It delivers that signature tangy flavor and creamy texture without any gluten, making it a fantastic choice for gatherings or a special weekend indulgence. Crafted with simple ingredients, this key lime pie recipe proves that gluten-free baking can be both easy and incredibly delicious. You’ll love the hint of cinnamon from the Chex crust and the smooth, vibrant filling.
Key takeaways
- The crust's texture relies on precise liquid amounts and pre-baking.
- Achieve a smooth filling by gently but thoroughly combining ingredients.
- Avoid overbaking to prevent cracks and ensure a set center.
- Use high-quality key lime juice for the authentic tart flavor.
Gluten-Free Key Lime Pie Recipe
Ingredients
Method
- Preheat oven to 350°F (177°C).
- Mix crushed Chex cereal, Bisquick, and melted butter. Add ice water and mix until it holds together. Press firmly into a 9-inch pie plate.
- Bake the crust for 10-12 minutes until lightly golden. Let it cool.
- In a separate bowl, whisk together egg yolks, vanilla extract, sweetened condensed milk, and key lime juice until smooth and creamy.
- Pour the filling into the cooled crust.
- Bake for 15-20 minutes, or until the filling is set but still has a slight jiggle. Let cool completely, then chill for at least 2 hours.
Notes
– Don’t overbake the pie; the center should be slightly jiggly.
– Chill thoroughly for the best texture and flavor melding. Allergens: Milk, Eggs, Soybeans, Wheat. Nutrition information is an estimate, calculated automatically. Values vary with brands, substitutions and portion sizes.
The technique that makes it
The magic behind a perfect gluten-free key lime pie lies in the careful balance of the crust and the filling. For the crust, the combination of crushed Gluten-Free Cinnamon Chex cereal and Gluten-Free Bisquick provides a sturdy yet tender base. The melted butter acts as a binder, ensuring the crumbs hold together when pressed into the pie plate. Crucially, the ice water is added sparingly; too much will make the crust soggy, while too little will prevent it from forming a cohesive unit. Pressing the crust firmly and evenly into the pan, especially up the sides, is vital for structural integrity. Pre-baking the crust for about 10-12 minutes at 350°F (175°C) allows it to set and become crisp, preventing a soggy bottom once the filling is added. The filling’s texture is achieved through the emulsification of egg yolks, sweetened condensed milk, and key lime juice. The egg yolks provide richness and help thicken the filling as it bakes. Sweetened condensed milk contributes sweetness and a creamy consistency. The acidity of the key lime juice is essential; it reacts with the proteins in the egg yolks and milk, causing them to coagulate and set the filling. Stirring these ingredients together gently but thoroughly ensures a smooth, homogenous mixture without incorporating too much air, which can lead to cracking. Baking the pie until the edges are set and the center has a slight wobble is key, as it will continue to set as it cools.
Troubleshooting
- Cracked Filling: Overbaking is the most common culprit. The rapid expansion of air and moisture within the pie causes it to puff up and then collapse, leading to cracks. To fix this, bake the pie just until the edges are set and the center is still slightly jiggly. Let it cool gradually.
- Soggy Crust: This often results from adding too much liquid to the crust mixture or not pre-baking it sufficiently. Ensure you use the exact amount of ice water, and pre-bake the crust until golden brown and firm before adding the filling.
- Grainy Filling: This can happen if the filling ingredients are not fully incorporated or if the pie is overcooked, causing the egg proteins to curdle. Whisk the filling ingredients until smooth, and avoid overbaking by checking for the slight wobble in the center.
- Lack of Tang: Using bottled key lime juice that has been diluted or is not 100% pure can result in a less intense flavor. Always opt for high-quality, 100% key lime juice for the authentic tartness.
Substitutions
- Crust Base: If Gluten-Free Cinnamon Chex cereal is unavailable, you can substitute with other gluten-free graham crackers or cookies, crushed to a fine crumb. The flavor profile will change slightly depending on the cookie used.
- Gluten-Free Flour: In place of Gluten-Free Bisquick, a blend of gluten-free all-purpose flour (with xanthan gum) can be used, though you may need to adjust the liquid slightly to achieve the correct dough consistency.
- Lime Juice: While key limes are preferred for their unique floral aroma and tartness, regular Persian limes can be used. You will need approximately 1.5 cups of fresh Persian lime juice, but the flavor will be less complex and more straightforwardly sour.
- Sweetener: For a dairy-free version, you could experiment with a dairy-free sweetened condensed milk alternative, though the texture and sweetness may vary.
Pro tips
- Use actual Key Lime juice for the most authentic flavor.
- Don’t overbake the pie; the center should be slightly jiggly.
- Chill thoroughly for the best texture and flavor melding.
Enjoy this delightful gluten-free key lime pie, a perfect ending to any meal. Serve chilled for maximum refreshment!
Try this next: Pecan Pie Bliss: No Crust Needed!
More from Gluten-Free Desserts & Sweets →
Frequently asked questions
Can I make gluten-free key lime pie ahead of time?
Yes, gluten-free key lime pie is an excellent make-ahead dessert. You can prepare the entire pie up to 2 days in advance. Store it covered in the refrigerator. The crust will soften slightly over time, but the flavors will meld beautifully. Garnish just before serving for the best presentation.
What’s the best crust for gluten-free key lime pie?
A classic graham cracker crust is traditional, but for gluten-free, consider using gluten-free graham cracker crumbs or a nut-based crust. Almond flour or a mix of almond and coconut flour with melted butter and a touch of sugar works wonderfully. Press it firmly into the pan for a sturdy base.
How do I know when gluten-free key lime pie is done baking?
The pie is done when the edges are set and the center is just slightly jiggly, like Jell-O. It will continue to set as it cools. Overbaking can cause cracks. A toothpick inserted near the center should come out mostly clean.
How should I store leftover gluten-free key lime pie?
Leftover gluten-free key lime pie should be stored covered in the refrigerator. It will keep well for up to 3-4 days. While it can be frozen, the texture of the filling might change slightly upon thawing. It’s best enjoyed fresh or within a few days of baking.