Wholly gluten free pie crust is the frozen pie shell that has saved more gluten-free holidays than almost any other product, and for good reason. Made by the brand Wholly Gluten Free, also sold under the Wholly Wholesome name, these ready-to-bake 9-inch shells let you skip the trickiest part of gluten-free baking, the pastry, and still serve a real pie. They are certified gluten free and also free of wheat, dairy, eggs, soy, peanut, tree nut, and sesame, which makes them a rare allergen-friendly shortcut for crowded holiday tables. This guide covers exactly what is in the Wholly crust, how to bake it without cracks or sogginess, how to blind bake it for custard and cream pies, and, because store-bought is not the only path, how to make a flaky gluten-free crust from scratch when you want full control.
Pastry is the hardest thing to get right without wheat, because a pie crust depends on a careful balance of structure and tenderness that gluten normally provides. That is why a dependable store-bought shell is such a relief, and also why the homemade version rewards a few specific techniques. We will cover both so you can choose the route that fits your day.
What Is in a Wholly Gluten Free Pie Crust
The Wholly Gluten Free 9-inch pie shell is built on a short, recognizable ingredient list: brown rice flour, palm fruit shortening, water, organic cane sugar, tapioca starch, potato starch, sea salt, aluminum-free baking powder, and guar gum. Brown rice flour is the base, the starches give the crust its tenderness and bind, the palm shortening provides the fat that makes it short and crumbly, and the guar gum stands in for the elasticity that gluten would normally supply. The product is certified gluten free, meaning it is tested below the safe threshold for gluten, and it is also certified plant-based and Non-GMO Project verified. Because it is free of the major allergens, including dairy and eggs, it works for a wide range of dietary needs at once, which is part of why it shows up at so many mixed-diet holiday meals. It comes as a frozen two-pack, so you get two shells, useful when a recipe needs both a bottom and a top crust.
How to Thaw and Handle the Frozen Shell
The first rule with a frozen gluten-free crust is to let it warm slightly before you do anything to it, because gluten-free pastry is brittle when cold and cracks if you force it. Thaw the shell at room temperature for about ten to twenty minutes, just until it is no longer rock hard but still cool. At that point it is pliable enough to crimp the edge, patch any small cracks with your fingers, or press a second shell on top for a double-crust pie. Do not let it come fully to room temperature and go soft, since a too-warm crust slumps and tears. If a crack does appear, you can seal it the same way you would homemade gluten-free dough: press it together gently with a warm fingertip, or dab a little water and smooth it closed. Handle the shell as little as possible, and work quickly once it is thawed.
Baking a Filled Pie Without a Soggy Bottom
The most common complaint with any pie crust, gluten free or not, is a soggy bottom, and gluten-free crusts are a little more prone to it because their starches absorb moisture readily. The fix is to give the bottom a head start. For a wet filling like pumpkin, custard, or fruit, brush the inside of the thawed shell with a thin layer of beaten egg, or a dairy-free wash if you are keeping it vegan, and par-bake the empty shell for about ten minutes before adding the filling. That seals the surface so the filling does not soak straight into the pastry. Bake the filled pie on a preheated baking sheet on a low oven rack, which drives heat into the bottom and crisps it. If the crimped edge browns faster than the center, which gluten-free crusts often do, shield the rim with a strip of foil or a pie shield for the last stretch of baking. These small moves are the difference between a crisp slice and a damp one.
Blind Baking for Cream and Custard Pies
Cream pies, chocolate pies, and some custards need a fully baked empty crust, called a blind-baked shell, and gluten-free pastry blind bakes well with the right method. Start by pricking the bottom of the thawed shell all over with a fork to let steam escape and prevent bubbling. Line the inside with foil or parchment and fill it with pie weights or dried beans to hold the shape, since gluten-free crust can slump without support. Bake at a hot oven, around 400 to 425 degrees Fahrenheit, for about twelve minutes, then remove the weights and the liner and return the shell to the oven for another six to eight minutes until the bottom is dry and lightly golden. Watch the edges, which color fast, and shield them if needed. A fully blind-baked Wholly shell gives you a crisp, sturdy base for a no-bake or stovetop filling, which is one of the easiest gluten-free desserts you can assemble.
Making a Gluten-Free Pie Crust From Scratch
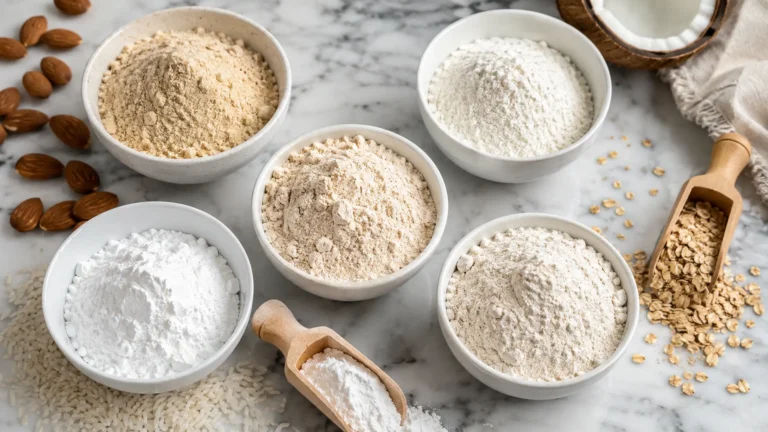
When you want to make your own, a flaky gluten-free crust is within reach with the right blend and a couple of technique shifts. Use a gluten-free flour blend built on white and brown rice flour with tapioca and potato starch, plus a binder of xanthan or guar gum, which mirrors the Wholly ingredient logic. Keep your fat very cold, whether that is butter, shortening, or a dairy-free fat, and cut it into the flour so you leave small flakes that create layers. The biggest difference from wheat pastry is hydration: gluten-free dough needs more liquid and a rest. Add the water until the dough is genuinely cohesive, not crumbly, then wrap and chill it so the rice flour can fully hydrate, which is what stops the gritty texture and the cracking. The starches and gum here do the same job as in a packaged crust, and understanding the components is easier once you have read up on gluten-free flour and how each flour and starch behaves.
Rolling Without Cracking
Rolling is where homemade gluten-free crust intimidates people, because the dough lacks the stretch of wheat pastry and wants to crack at the edges. Three habits solve it. First, let the chilled dough warm for about ten minutes in a normal kitchen so it is cool but not stiff, which makes it far more cooperative. Second, roll it between two sheets of parchment paper rather than on a floured counter, so you never have to lift and tear it. Third, accept that you will patch: gluten-free crust is meant to be pressed and mended, so use the warmth of your hands to seal any cracks, and if it splits while transferring to the pan, just press the pieces back together in the dish. The dough that cracks a little while rolling still bakes into a tender, flaky crust, so do not chase a perfect wheat-style round. Patch, press, and move on.
Store-Bought Versus Homemade: How to Choose
There is no wrong answer between a Wholly shell and a homemade crust; there is only the right answer for the day you are having. A store-bought gluten-free shell wins on time and reliability. It is already mixed, rolled, and fitted into a pan, it bakes consistently because the formula is engineered, and it removes the one step, rolling and transferring delicate gluten-free pastry, that causes the most frustration and failure. For a busy holiday, a weeknight pie, or a baker who has been burned by cracking dough, that consistency is worth a lot, and the certified allergen-free profile means you can serve it to almost any guest. Homemade crust wins on cost, flavor control, and craft. You can dial in the fat for more flakiness, adjust the salt and sugar, choose your own flour blend, and make a crust that tastes distinctly buttery or distinctly tender depending on your fat choice. It also costs noticeably less per pie once you have the flours on hand. A practical middle path many gluten-free bakers settle on is to keep a couple of Wholly shells in the freezer for emergencies and busy stretches, while learning to make their own crust for the bakes they care most about. Neither route is a compromise on safety, since both can be fully gluten free, so the choice comes down to time, budget, and how much you enjoy the process.
Common Gluten-Free Pie Crust Mistakes
A handful of mistakes account for most disappointing gluten-free pies, and each has a clear fix once you know to look for it. The first is working the crust cold, whether store-bought or homemade, which makes it brittle and prone to cracking, so always let a frozen or chilled crust warm just enough to be pliable before you handle it. The second is under-hydrating homemade dough. Bakers used to wheat pastry add too little water out of habit, and gluten-free dough genuinely needs more liquid and a rest to hydrate the rice flour, without which the crust turns out gritty and cracks at every edge. The third is skipping the par-bake on a wet filling, which guarantees a soggy bottom because gluten-free starches soak up moisture eagerly. The fourth is letting the edges burn, since gluten-free crust browns faster than wheat, so a foil shield on the rim is almost always worth using. The fifth is cutting into a pie too soon: gluten-free crust and many fillings set as they cool, and slicing a warm pie tears the crust and runs the filling, so let it cool and set before serving. Avoid those five, warm the crust, hydrate the dough, par-bake wet fillings, shield the edges, and cool before cutting, and the gap between a frustrating gluten-free pie and a clean, sliceable one closes almost entirely.
Fillings That Shine in a Gluten-Free Crust
A good crust deserves a filling that earns it, and most classic pie fillings are naturally gluten free or easily made so. Pumpkin, pecan, fruit, custard, and cream fillings rarely need wheat, though you should thicken fruit pies with cornstarch or tapioca rather than flour, both of which are gluten free and give a clean, glossy set. A pumpkin pie in a Wholly shell is one of the simplest gluten-free holiday desserts going, and it sits comfortably next to a homemade gluten-free pumpkin bundt cake on a fall dessert table. For a fruit pie, toss the fruit with sugar and a starch thickener and par-bake the bottom as described above. The crust and filling together round out a spread of gluten-free holiday baking without anyone missing the wheat. For tested fillings and thickening ratios, the pie research at America’s Test Kitchen is meticulous, and Bon Appetit has reliable methods for custard and cream pies that adapt cleanly to a gluten-free shell.
Storing and Freezing Gluten-Free Pie Crust
Gluten-free pie crust, whether store-bought or homemade, stores well, which makes it easy to keep one on hand for a last-minute dessert. The Wholly shells arrive frozen and should stay in the freezer until you are ready to use them, then thaw only as long as the directions call for, since refreezing a thawed shell repeatedly degrades its texture. Homemade dough is just as freezer-friendly. You can wrap a disk of unbaked gluten-free pie dough tightly and freeze it for up to a couple of months, then thaw it in the refrigerator overnight before letting it warm slightly to roll, which actually improves the crust because the long rest gives the rice flour time to hydrate fully. You can also freeze a fully fitted, unbaked crust right in its pan, ready to fill and bake straight from frozen for many recipes. Baked empty shells freeze well too, which is handy for cream and custard pies, since you can blind bake a batch and pull one out as needed. In the refrigerator, unbaked dough keeps for a few days wrapped tightly, though gluten-free dough firms up considerably when chilled, so plan for that ten-minute warm-up before rolling. The one storage habit that matters most is keeping the dough well wrapped, because gluten-free dough dries out faster than wheat dough and a dry crust cracks. Wrap it tightly, thaw it gently, and a stored gluten-free crust performs just as well as a fresh one.
Frequently Asked Questions
Is Wholly Gluten Free pie crust actually safe for celiacs?
Yes. The Wholly Gluten Free pie shell is certified gluten free, meaning it is tested below the safe gluten threshold, and it is also free of wheat, dairy, eggs, soy, peanut, tree nut, and sesame. That certification and allergen profile make it a dependable choice for people with celiac disease and multiple food allergies.
How do I keep a gluten-free pie crust from getting soggy?
Give the bottom a head start. Brush the thawed shell with egg or a dairy-free wash, par-bake it about ten minutes before adding a wet filling, and bake the pie on a preheated baking sheet on a low rack. Thickening fruit fillings with cornstarch or tapioca instead of flour also reduces excess moisture.
How do I blind bake the Wholly crust?
Prick the thawed shell all over with a fork, line it with foil or parchment, and fill with pie weights or dried beans. Bake at 400 to 425 degrees Fahrenheit for about twelve minutes, then remove the weights and liner and bake six to eight minutes more until the bottom is dry and golden. Shield the edges if they brown too fast.
Why does my homemade gluten-free crust crack when I roll it?
Because gluten-free dough lacks the stretch of wheat pastry and is often too cold or too dry. Let chilled dough warm about ten minutes, roll it between two sheets of parchment, and add enough water that the dough is cohesive, not crumbly. Patch any cracks with warm hands; the crust still bakes tender and flaky.
Can I make a double-crust pie with Wholly shells?
Yes. The product comes as a two-pack precisely so you can use one shell as the bottom and the second as a top. Thaw both slightly so they are pliable, fill the bottom, and lay or crimp the second shell over the top, sealing and venting it as you would any double-crust pie.
What flour makes the best homemade gluten-free crust?
A blend works best, typically white and brown rice flour for the base, tapioca and potato starch for tenderness and bind, and xanthan or guar gum to replace gluten’s elasticity. This mirrors the ingredient logic of packaged crusts. A measure-for-measure blend that already includes a binder is the easiest starting point.
Bottom Line
Wholly gluten free pie crust earns its place in the freezer because it removes the hardest part of gluten-free baking while staying genuinely safe, with a certified gluten-free shell that is also free of the major allergens. Thaw it just until pliable, par-bake and shield the edges to beat sogginess and over-browning, and blind bake it properly for cream and custard pies, and a store-bought shell will carry a holiday pie with no one the wiser. When you want full control, a homemade crust is well within reach: build it on a rice-flour blend with cold fat and a binder, hydrate it more than you would wheat dough, chill it so the flour softens, and roll it between parchment, patching as you go. Either way, fill it with the naturally gluten-free classics, pumpkin, pecan, fruit, and custard, thickened with cornstarch rather than flour. Store-bought for ease or homemade for craft, a good gluten-free crust means pie is back on the table.