These gluten-free waffles feature pumpkin and warm spices. This recipe provides a simple way to enjoy a seasonal breakfast without gluten.
Key takeaways
- Ensure all wet ingredients are at a similar temperature for better emulsification.
- Allow the gluten-free batter to rest for 10-15 minutes to hydrate the flours.
- Preheat your waffle iron thoroughly to a medium-high setting for a crisp exterior.
- Do not overmix the batter once the flour is added to avoid a gummy texture.

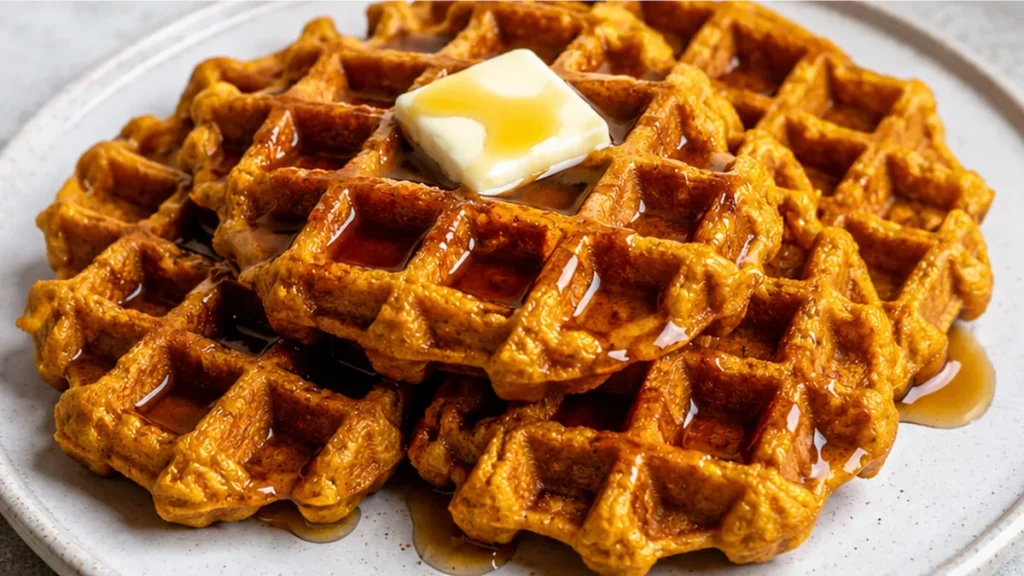
Fluffy Gluten-Free Pumpkin Waffles! Your Fall Favorite!
Ingredients
Method
- Preheat the oven to 200°F. Place a wire rack on a large baking sheet and set aside.
- In a medium bowl, whisk together the gluten-free flour, dark brown sugar, baking powder, salt and pumpkin pie spice.
- In the bowl of a stand mixer, or using a hand mixer, beat the eggs for 1-2 minutes until light and fluffy. Add the milk, pumpkin, melted butter, and maple syrup and beat on medium speed until combined.
- Add the dry ingredients and beat until just combined.
- Preheat the waffle iron. When the waffle iron is hot, lightly spray the inside with cooking spray, then scoop in the batter. Cook according to the waffle maker’s instructions.
- Serve immediately or keep warm on the wire rack-lined baking sheet in the warm oven until ready to serve.
Notes
– For perfectly golden and crispy waffles, make sure your waffle iron is fully preheated before adding the batter.
– Leftover waffles can be stored in an airtight container in the refrigerator for up to 3 days or frozen for up to 2 months. Reheat in a toaster or oven at 350°F (175°C) for 5-10 minutes until crisp. Nutrition information is an estimate, calculated automatically. Values vary with brands, substitutions and portion sizes.
The Science Behind Perfect Gluten-Free Pumpkin Waffles
Emulsification and Hydration for Tender Waffles
The key to tender, fluffy gluten-free waffles lies in proper emulsification and hydration. In this recipe, the eggs, milk, pumpkin puree, melted butter, and maple syrup form the liquid base. When combined with the gluten-free flour blend, these wet ingredients need to be thoroughly incorporated to ensure a uniform batter. Gluten-free flours lack the gluten protein that provides structure and elasticity in traditional baking. Therefore, the starches and binders present in your measure-for-measure blend (often containing xanthan gum or psyllium husk) are crucial for mimicking gluten’s role. Ensuring all the wet ingredients are at a similar temperature before mixing helps create a stable emulsion, preventing the fats from separating and leading to a smoother, more cohesive batter. The pumpkin puree adds significant moisture; it’s important not to overmix once the flour is added, as this can still lead to a gummy texture in gluten-free baking, even without gluten. Resting the batter for 10-15 minutes allows the flours to fully hydrate, leading to a better texture and preventing grittiness.
Temperature Control for Golden-Crisp Exterior
Achieving a golden-brown exterior while ensuring the inside is cooked through is a matter of precise heat management. A waffle iron that is too cool will result in pale, soft waffles that may stick. Conversely, an iron that is too hot can burn the outside before the inside is cooked. For gluten-free batters, which can sometimes be more delicate, a medium-high heat setting is typically ideal. This temperature allows the Maillard reaction and caramelization to occur, creating that desirable crispness and flavor, without scorching the waffle. Ensure your waffle iron is preheated thoroughly before adding batter. The melted butter in the batter also aids in crisping and prevents sticking, contributing to the Maillard reaction on the waffle’s surface.
Troubleshooting Your Gluten-Free Waffles
- Problem: Waffles are dense and heavy.
Fix: Ensure your baking powder is fresh and properly distributed. Overmixing the batter after adding flour can also cause density in gluten-free recipes; mix just until combined. Allow the batter to rest for 10-15 minutes to hydrate the flours. - Problem: Waffles are pale and soft.
Fix: Your waffle iron may not be hot enough. Preheat it thoroughly on a medium-high setting. Ensure you are using the correct amount of baking powder and that your oven is calibrated if using it to keep waffles warm. - Problem: Waffles are sticking to the iron.
Fix: Make sure the waffle iron is adequately greased or non-stick. The melted butter in the recipe helps, but a light spray or brush of oil on the iron before the first waffle can prevent initial sticking. - Problem: Waffles have a gritty texture.
Fix: This often indicates the gluten-free flour blend hasn’t fully hydrated. Let the batter rest for at least 10-15 minutes before cooking. Ensure all dry ingredients are well whisked into the wet ingredients.
Substitutions for Gluten-Free Waffles
- Milk: Any non-dairy milk (almond, soy, oat) can be substituted for dairy milk. The resulting waffle may have a slightly different flavor profile and texture, potentially a bit denser depending on the fat content of the non-dairy milk.
- Butter: Coconut oil or a neutral vegetable oil can replace melted butter. This will alter the richness and flavor slightly. Coconut oil may impart a subtle coconut note.
- Maple Syrup: Honey or agave nectar can be used as a sweetener. This will change the sweetness profile and may affect the final color of the waffle due to different sugar compositions.
- Pumpkin Pie Spice: A blend of cinnamon (1 tsp), ginger (½ tsp), nutmeg (¼ tsp), and cloves (⅛ tsp) can be used if pumpkin pie spice is unavailable. The flavor intensity might vary slightly.
Pro tips
- Don’t overmix the batter once the dry ingredients are added; mix just until combined to ensure tender waffles.
- For perfectly golden and crispy waffles, make sure your waffle iron is fully preheated before adding the batter.
- Leftover waffles can be stored in an airtight container in the refrigerator for up to 3 days or frozen for up to 2 months. Reheat in a toaster or oven at 350°F (175°C) for 5-10 minutes until crisp.
Enjoy these delightful gluten-free pumpkin waffles as a perfect start to your day or a cozy weekend treat. Experiment with different toppings like whipped cream, nuts, or a sprinkle of extra cinnamon. Happy cooking!
Frequently asked questions
Can I make these waffles ahead of time?
Yes, you can make these gluten-free waffles ahead of time. Once cooked, allow them to cool completely on a wire rack. Store them in an airtight container in the refrigerator for up to 3 days or freeze them for longer storage. Reheat in a toaster or oven for best results.
What kind of gluten-free flour should I use?
Use a good quality gluten-free measure-for-measure flour blend that contains xanthan gum. Brands like Bob’s Red Mill 1-to-1 Baking Flour or King Arthur Gluten-Free Measure for Measure Flour work well. These blends are designed to mimic the properties of all-purpose flour in baking.
Why are my gluten-free waffles gummy?
Gummy gluten-free waffles often result from under-hydrated flours or overmixing. Ensure you let the batter rest for at least 10-15 minutes to allow the flours to absorb moisture. Mix the batter only until the dry ingredients are just incorporated.
Can I use fresh pumpkin puree instead of canned?
Yes, you can use fresh pumpkin puree. Ensure it is pure pumpkin puree and not pumpkin pie filling. You’ll need to roast and puree your own pumpkin, and be sure to drain off any excess moisture, as fresh pumpkin can be wetter than canned.
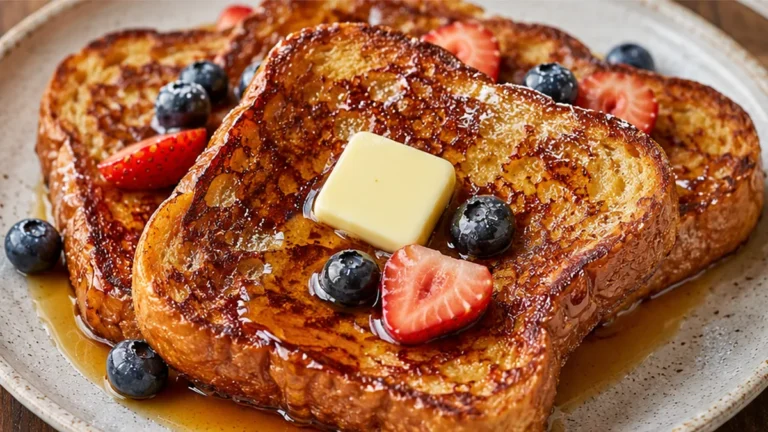
Try this next: Gluten-Free French Toast: Pure Bliss!
More from Gluten-Free Breakfast & Brunch →