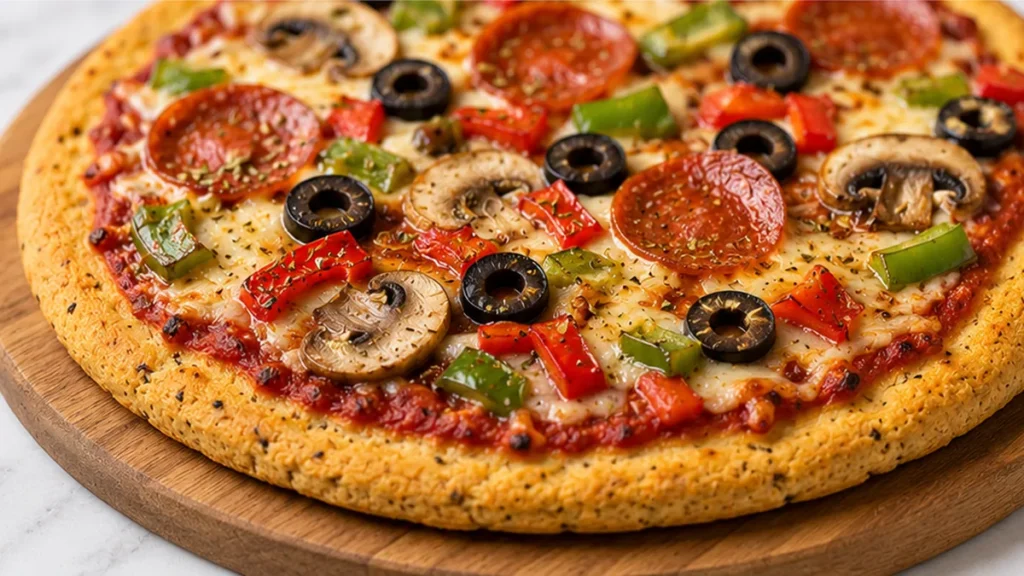
The ultimate chickpea pizza crust recipe for anyone seeking a delicious, gluten-free alternative to traditional pizza bases. This recipe requires minimal ingredients and effort, delivering a wonderfully crisp yet chewy crust that holds up perfectly to your favorite toppings. Whether you’re managing a gluten intolerance or simply looking for a healthier pizza option, this chickpea pizza base is a real upgrade. Its simplicity and fantastic flavor profile make it a weeknight dinner hero.
Key takeaways
- The success of chickpea pizza crust relies on proper batter hydration and cooking technique.
- Cook the crust until set and slightly golden before adding toppings to prevent gumminess.
- Ensure adequate oil is used to prevent sticking and achieve a crispier texture.
- Adjust cooking time based on your stove and pan for optimal results.
Chickpea Pizza Crust: Gluten-Free Magic!
Ingredients
Method
- Preheat oven to 425°F (220°C). Place a 10” cast iron pan inside to preheat.
- In a medium bowl, whisk together chickpea flour, salt, and Italian seasoning (if using).
- Slowly whisk in 1 cup of warm water until fully combined. Let it sit to thicken slightly.
- Carefully brush 1 tbsp of olive oil over the hot cast-iron pan.
- Whisk the remaining 1 tbsp olive oil into the chickpea batter.
- Pour the batter into the hot pan, spreading it into an even layer with a spatula.
- Bake for 15-17 minutes, until the crust edges are golden brown and crisp.
- Add your favorite pizza toppings and bake for another 15 minutes until bubbly and delicious.
Notes
– Don’t skip whisking the oil into the batter; it helps with texture and prevents sticking.
– Experiment with different herbs and spices in the crust for varied flavors. Allergens: Soybeans. Nutrition information is an estimate, calculated automatically. Values vary with brands, substitutions and portion sizes.
The technique that makes it
The magic behind this chickpea pizza crust lies in the hydration and cooking method of the chickpea flour. Chickpea flour, also known as besan or gram flour, is derived from dried chickpeas and is naturally gluten-free. When mixed with water, it forms a batter that, when cooked, sets into a cohesive and surprisingly sturdy crust. The key is achieving the right batter consistency – not too thick, not too thin – which allows it to spread evenly and cook through without becoming gummy or brittle. The initial cooking phase, often done in a skillet or on a baking sheet, is crucial for setting the structure. This involves heating the batter until it begins to pull away from the sides and forms a solid base. This step gelatinizes the starches in the chickpea flour, creating a network that holds the crust together. The addition of olive oil contributes to a slightly crispier exterior and prevents sticking. Properly hydrating the flour ensures all the starches are accessible for gelatinization, leading to a crust that is pliable enough to handle toppings yet firm enough to support them.
Troubleshooting
- Crust is gummy or dense: This usually means the batter was too thick, or it wasn’t cooked long enough during the initial setting phase. Try adding a little more water to the batter next time to achieve a thinner consistency, similar to pancake batter. Ensure you cook the crust until the edges are firm and the center is set before adding toppings.
- Crust is too brittle or cracks easily: This can happen if the batter was too thin, or if it was overcooked before toppings were added. A slightly thicker batter can help. Also, avoid over-baking the crust before adding toppings; it should be set but not completely dry.
- Crust is sticking to the pan: Insufficient oil or cooking the crust for too short a time before attempting to move it can cause sticking. Ensure the pan is well-greased with olive oil, or use parchment paper. Cook the crust until it visibly starts to firm up and pull away from the pan edges.
- Crust tastes raw or has a strong bean flavor: This often indicates undercooking. Chickpea flour needs sufficient heat to cook through and mellow its flavor. Ensure the crust is cooked on medium heat for the recommended time on both sides, or until golden brown and firm.
Substitutions
- Olive oil: Avocado oil or another neutral-flavored cooking oil can be used in place of olive oil. The result will be similar in terms of preventing sticking and aiding crispiness, though the subtle flavor of olive oil will be missed.
- Water: While water is ideal for its neutral flavor and ability to hydrate the flour, unsweetened almond milk or soy milk could be used. This might slightly alter the flavor profile and potentially the texture, making it a bit softer.
- Italian seasoning: If you don’t have Italian seasoning, you can omit it or create your own blend using dried oregano, basil, thyme, and rosemary. This will allow for a customizable flavor profile for your pizza.
- Chickpea flour: For a different flavor and texture, you could experiment with a blend of chickpea flour and another gluten-free flour like brown rice flour or sorghum flour, keeping the total flour amount the same. This will change the crust’s density and taste.
Pro tips
- Ensure your cast iron pan is thoroughly preheated for maximum crispiness.
- Don’t skip whisking the oil into the batter; it helps with texture and prevents sticking.
- Experiment with different herbs and spices in the crust for varied flavors.
Try this versatile chickpea pizza crust and enjoy a satisfying, homemade pizza experience without the gluten. It’s a simple, healthy, and delicious way to satisfy your pizza cravings.
Try this next: Healthy Chickpea Chocolate Chip Cookies
More from Gluten-Free Pasta & Pizza →
Frequently asked questions
Can I make chickpea pizza crust ahead of time?
Yes, you can prepare the chickpea pizza crust dough a day in advance. Store it in an airtight container in the refrigerator. When ready to bake, let it come to room temperature for about 30 minutes before pressing it into your pizza pan. This makes for a convenient make-ahead meal option.
How do I know when chickpea pizza crust is done?
The chickpea pizza crust is done when it’s firm to the touch and the edges are golden brown. You can test its doneness by gently pressing the center; it should not feel wet or doughy. A fully baked crust will hold its shape well and have a slightly crisp texture.
What can I serve with chickpea pizza crust?
Chickpea pizza crust is versatile and pairs well with a variety of toppings. Classic pizza sauces, cheeses, vegetables, and proteins work wonderfully. Consider roasted vegetables, pesto, or even a simple sprinkle of herbs and olive oil for a lighter option. It’s a great base for any pizza creation.
Can I freeze chickpea pizza crust dough?
You can freeze the baked chickpea pizza crust for future use. Allow the baked crust to cool completely, then wrap it tightly in plastic wrap followed by a layer of aluminum foil or place it in a freezer-safe bag. It will keep for up to 2-3 months and can be reheated from frozen.