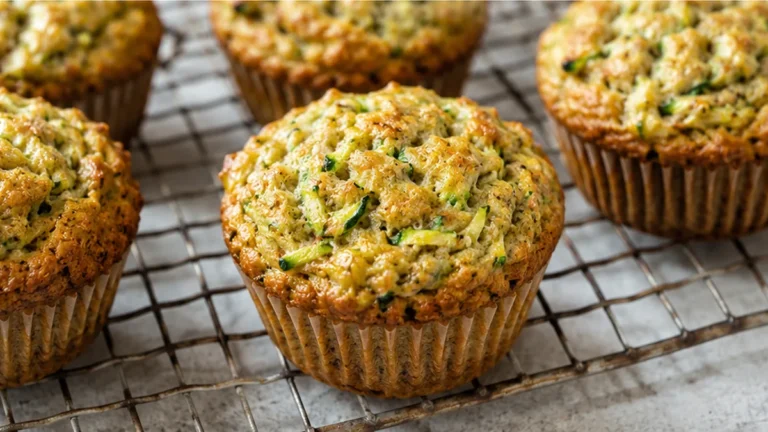
Baked oatmeal cups are a fantastic way to enjoy a wholesome, satisfying breakfast, especially when you’re on the go. This recipe for baked oatmeal cups is not only delicious but also incredibly versatile, catering to gluten-free and vegan dietary needs without compromising on flavor or texture. I remember the first time I made these, I was skeptical about how well they would hold their shape without eggs. But by letting the batter sit for a few minutes, the oats absorb moisture, creating a perfect structure. They’re ideal for busy mornings, meal prep, or even a healthy snack, proving that a nourishing breakfast can also be convenient. These baked oatmeal cups offer a wonderfully chewy yet tender texture, packed with the goodness of oats and customizable with your favorite mix-ins. They’re a true game-changer for anyone looking to simplify their morning routine with a healthy and satisfying option.
Key takeaways
- Hydration of oats and chia seeds is key for texture and binding.
- Proper emulsion of wet ingredients ensures tenderness and prevents separation.
- Baking powder provides necessary lift for a lighter, cake-like consistency.
- Allowing the mixture to rest enables full liquid absorption, preventing a chalky result.
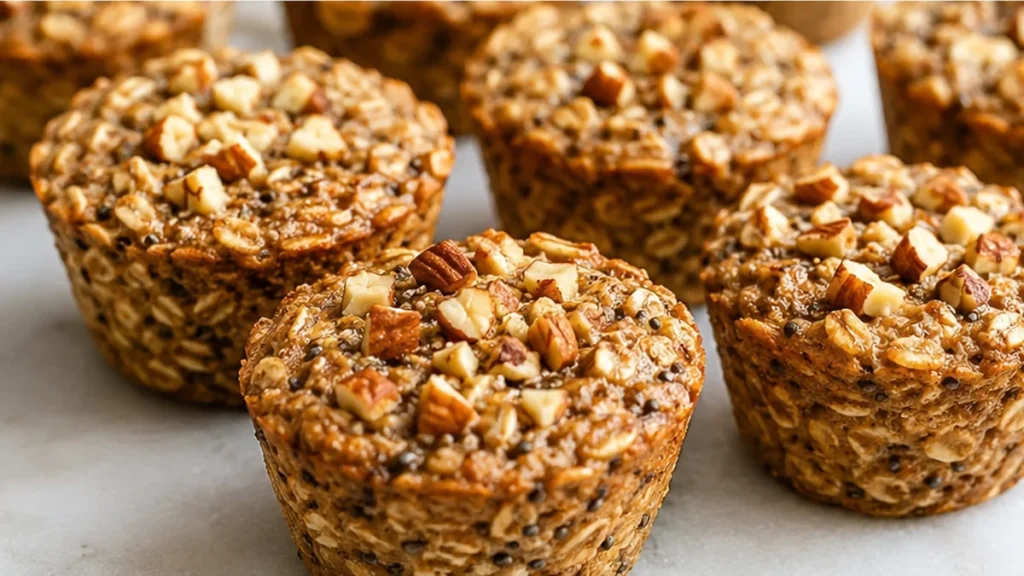
Grab-and-Go Baked Oatmeal Cups
Ingredients
Method
- Preheat the oven to 350 degrees F (175 C) then spray a 12 cup muffin tin very well with nonstick spray and set aside.
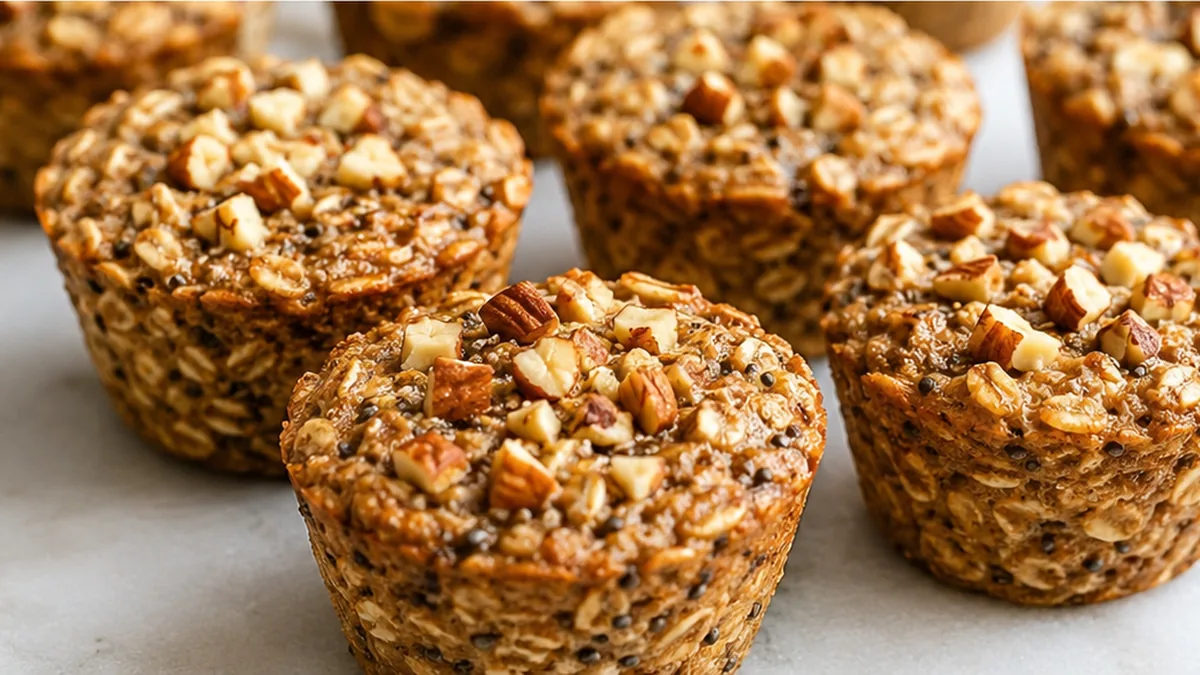
- Add 1 cup oats to a food processor or high powered blender then process until they’ve turned into flour. Add the flour to a large mixing bowl then add remaining 1-1/2 cups oats, nuts (if using), chia seeds, cinnamon, baking powder, and salt then whisk to combine.
- To a medium-size mixing bowl add the milk, applesauce, maple syrup, coconut oil, eggs (or flax eggs) and vanilla then whisk to combine. If some of the coconut oil clumps up, that’s ok — it will melt in the oven.
- Let the batter sit and thicken for 5 minutes then scoop 1/4 cup into each of the prepared muffin cups. Bake for 25-30 minutes or until the edges of the oatmeal cups are browned and the centers have set. Err on the side of overbaking vs underbaking.
- Let the oatmeal cups sit in the muffin tin for 10 minutes before running a knife along the outside of each cup and removing to a cooling rack to cool completely.
- Store leftover Baked Oatmeal Cups in an airtight container in the refrigerator for up to 5 days then eat chilled, or microwave for 20-30 seconds or until warmed through.
Notes
– Don’t be afraid to experiment with other fruit purees like mashed banana or pumpkin for different flavor profiles.
– To freeze, let the baked oatmeal cups cool completely, then store in an airtight container for up to 3 months. Thaw in the fridge overnight or microwave from frozen. Nutrition information is an estimate, calculated automatically. Values vary with brands, substitutions and portion sizes.
The science behind the perfect grab-and-go baked oatmeal cups
The success of these baked oatmeal cups hinges on a few key culinary principles working in harmony. Firstly, the combination of old-fashioned oats and chia seeds is crucial for texture. The oats provide the chewy base, while the chia seeds, when hydrated, form a gel-like substance. This gel acts as a binder, helping to hold the cups together without becoming overly dense or gummy. It’s a form of hydrocolloid binding, similar to how pectin works in jams.
Secondly, the wet-to-dry ingredient ratio is carefully balanced. The milk, applesauce, maple syrup, melted coconut oil, and eggs create an emulsion. The fat from the coconut oil and the lecithin in the eggs help to emulsify the liquid ingredients, preventing separation and ensuring a tender crumb. The applesauce contributes moisture and a subtle sweetness, while the maple syrup adds flavor and aids in browning due to its sugar content.
Baking powder is essential for leavening. It reacts with the liquid and heat to produce carbon dioxide gas, creating small air pockets within the oatmeal mixture. This results in a lighter, more cake-like texture rather than a dense, heavy brick. The heat of the oven then sets the structure created by the hydrated oats, chia seeds, and the proteins from the eggs.
Finally, the resting period after mixing allows the oats and chia seeds to fully absorb the liquid. This hydration step is critical; it softens the oats, preventing a chalky texture, and allows the chia seeds to swell and gel, contributing to the cohesive structure of the baked cups. Without adequate resting, the cups may crumble easily.
Troubleshooting
- Problem: Oatmeal cups are too dry and crumbly. Fix: Ensure you measured the liquid ingredients accurately. Also, allow the mixture to rest for at least 10-15 minutes before baking to ensure oats and chia seeds fully hydrate.
- Problem: Oatmeal cups are gummy or dense. Fix: Avoid using quick-cooking oats, which absorb liquid too quickly and can lead to a gummy texture. Also, ensure you haven’t over-mixed the batter after adding the wet ingredients, which can activate oat starches excessively.
- Problem: Oatmeal cups are sticking to the muffin tin. Fix: Thoroughly grease the muffin tin with non-stick spray or butter, or use silicone muffin liners. Ensure the coconut oil is slightly cooled before mixing to prevent it from solidifying too quickly and affecting the batter’s consistency.
- Problem: Oatmeal cups lack flavor. Fix: Double-check that you used pure maple syrup and not a flavored pancake syrup. Ensure the cinnamon measurement is accurate, and consider adding a pinch of nutmeg or a drop of vanilla extract for enhanced flavor complexity.
Substitutions
- Milk: Any dairy or non-dairy milk (almond, soy, oat) can be used. The result will be similar in texture, with minor flavor variations depending on the milk chosen.
- Maple Syrup: Honey or agave nectar can be substituted. Expect a slightly different flavor profile and potentially a slightly different browning rate due to the sugar composition.
- Coconut Oil: Other neutral-flavored oils like avocado oil or light olive oil can be used. Melted butter is also an option, which will add a richer flavor.
- Eggs: For a vegan option, use two flax eggs (2 tablespoons ground flaxseed mixed with 6 tablespoons water, let sit for 5 minutes). The texture will be slightly denser but still hold together well.
Pro tips
- For an extra nutritional boost, add a scoop of your favorite protein powder to the dry ingredients. Adjust liquid slightly if needed.
- Don’t be afraid to experiment with other fruit purees like mashed banana or pumpkin for different flavor profiles.
- To freeze, let the baked oatmeal cups cool completely, then store in an airtight container for up to 3 months. Thaw in the fridge overnight or microwave from frozen.
These Baked Oatmeal Cups are your new secret weapon for healthy, delicious, and convenient breakfasts. Try them this week and customize with your favorite fruits or spices. Enjoy your wholesome start to the day!
Frequently asked questions
Can I make these oatmeal cups ahead of time?
Yes, these baked oatmeal cups are perfect for meal prep. Once cooled, store them in an airtight container in the refrigerator for up to 4-5 days. They can be enjoyed cold or gently reheated in a microwave or toaster oven.
What is the best way to store leftover baked oatmeal cups?
For optimal freshness, store cooled baked oatmeal cups in an airtight container. You can place parchment paper between layers to prevent sticking. They will keep well in the refrigerator for up to 5 days.
Can I use quick oats instead of old-fashioned oats?
While you can use quick oats, the texture will be noticeably different. Quick oats tend to absorb liquid faster and can result in a denser, gummier texture compared to the chewier bite of old-fashioned oats.
How do I make this recipe vegan?
To make these vegan, substitute the milk with your favorite non-dairy milk and replace the two large eggs with two flax eggs. To make flax eggs, mix 2 tablespoons of ground flaxseed with 6 tablespoons of water and let it sit for 5 minutes until gelled.
Try this next: Creamy Pumpkin Maple Oats: Instant Pot Recipe
More from Gluten-Free Breakfast & Brunch →